Radon is estimated to be linked with about 21,000 deaths each year in the U.S., yet many homeowners try quick DIY tests that quietly give them the wrong picture of their indoor air. If you are testing on your own, avoiding common radon testing mistakes is just as important as choosing the test kit itself.
Key Takeaways
| Question | Short Answer |
| What is the biggest DIY radon testing mistake? | Improper test conditions, especially leaving windows or exterior doors open, can completely skew short‑term results. EPA closed-house rules are easy to miss. |
| Does my neighborhood or home price affect radon levels? | No. As we explain in our Wealthy Columbus radon testing guide, high-end and entry-level homes can both have elevated radon due to local geology. |
| Can a one-time DIY test fully “clear” my home? | Not always. Short-term tests only capture a snapshot. Seasonal and daily changes mean you may need follow-up or long‑term monitoring, especially in high‑risk zones. |
| Is DIY testing enough in a known high‑radon area? | DIY tests are a useful first step, but in areas like Licking County, which has some of the highest readings in America, we strongly recommend professional follow‑up if any result is elevated. See our regional overview at Licking County radon levels. |
| How much can poor DIY testing choices cost me later? | Misleading low readings can delay mitigation, which typically runs between $800–$2,500 in Columbus, based on our breakdown at radon mitigation cost breakdown. |
| Are there free or low-cost ways to test correctly? | Yes. Programs such as the Columbus Library radon testing program let you borrow continuous monitors, but you still need to avoid the common DIY mistakes below. |
| Why test if my county has “average” radon? | Even counties with average readings have individual homes with very high levels. Our Columbus radon zones guide explains why every home should be tested regardless of location. |
1. Ignoring How Radon Really Behaves Indoors
Many DIY testers treat radon like a simple on‑off problem, run a two‑day kit, and assume they are finished forever. In reality, radon levels drift with weather, seasons, and how you operate your home, so a single snapshot can give a false sense of security.
Short‑term readings can still be helpful if you understand their limits and know when to follow up. One national comparison study found that collocated short‑term measurements could explain up to 79 percent of seasonal variation and up to 67 percent of annual variation when interpreted correctly, which means there is still a margin of uncertainty that DIY users often overlook.
DIY mistake number one is assuming “one test, one time” answers everything. If your quick test is near the action level, repeating it or switching to a long‑term test is usually wise, especially in known high‑risk regions.

2. Setting Up DIY Radon Tests In The Wrong Place
Placement mistakes are one of the fastest ways to make a DIY radon test meaningless. Kits left on the floor, near a drafty window, or in a bathroom can show numbers that do not reflect what your family actually breathes most of the day.
For short‑term tests, you want a regularly occupied room on the lowest livable level, away from exterior doors, windows, vents, and direct sunlight. Avoid kitchens, bathrooms, and unfinished utility corners where humidity, steam, or fans can distort airflow around the device.
Many low‑cost DIY kits include instructions, but we regularly see test canisters sitting on concrete basement floors or tucked into furnace rooms. Those tests often read unusually low or high, and they can lead to poor decisions about whether mitigation is needed.
3. Ignoring EPA Closed‑House Requirements During Short‑Term Tests
One of the most common DIY radon testing mistakes is running a short‑term test with windows cracked open or fans pulling outdoor air through the home. EPA guidance is clear that short‑term testing should use “closed‑house” conditions to give a fair picture of typical worst‑case levels.
For 2–7 day tests, EPA protocols call for keeping exterior doors and windows closed for 12 hours before starting the test and throughout the test period. You can open doors briefly for normal entry and exit, but major ventilation changes or starting a test during severe storms can distort the readings.
If your DIY test was done while airing out the basement or with window fans running, it is worth repeating under proper conditions. Otherwise, you may under‑estimate radon and delay sensible mitigation that protects your family long term.
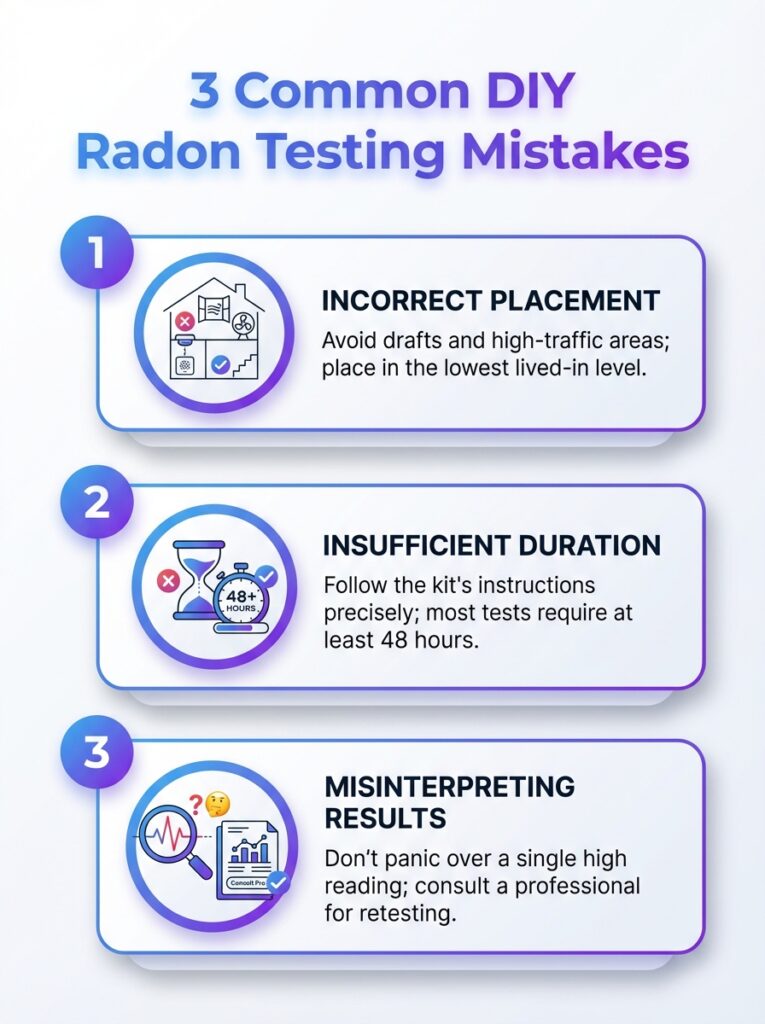
This infographic highlights the top 3 DIY radon testing mistakes and practical tips to ensure accurate results.
Did You Know?
75% of Americans have not tested their homes for radon, even though accurate testing is the only way to understand real indoor levels.
4. Trusting The Cheapest DIY Radon Gadgets Without Question
Online marketplaces are full of budget electronic radon monitors, and not all of them perform the way their product pages suggest. Independent testing shows that conforming consumer‑grade devices can keep short‑term error under about 22 percent, while non‑conforming units can drift from 28 percent up to 238 percent.
That kind of spread can change a 4.0 pCi/L reading into something that looks “safe” or dangerously high, even though the air has not changed at all. If you rely on a DIY device, choose one with third‑party performance data, quality control, and clear calibration or replacement guidance.
In some Central Ohio communities, libraries now lend out continuous monitors that meet recognized standards, which is a smart way to avoid guessing at quality. If your gadget has no documentation, no calibration plan, and wildly fluctuating numbers, treat it as a screening tool and confirm results with a professional device.


5. Misreading Short‑Term vs Long‑Term DIY Radon Results
Another DIY radon testing mistake is assuming any short‑term test equals a multi‑month average. Research on test duration shows that one‑week tests can be reasonably accurate in lower‑risk regions, but high‑radon areas may need three months of data to capture typical conditions.
If your home sits in a Zone 1 county or in a local “hot spot” neighborhood, we recommend using short‑term tests as a first step, not a final verdict. If your reading is borderline or your area is known for very high levels, moving to a 90‑day or longer test offers a clearer picture of everyday exposure.
Short‑term tests are excellent for real estate decisions because they deliver quick results under standardized conditions. For your long‑term peace of mind, pairing that with extended monitoring or a professional continuous test is a better strategy than relying on a single two‑day number from a hardware store kit.
6. Overlooking Local Radon Risk When You DIY Test
Many homeowners start DIY testing because they hear a national statistic and get curious, but they never check how their county actually compares. In our region, for example, Licking County has recorded some of the highest radon levels in America, and Franklin County sits in EPA Radon Zone 1, where many homes exceed recommended levels.
In high‑risk zones, assuming a single low DIY reading means “no problem” can be misleading. Weather shifts, home renovations, or foundation changes can alter pathways that radon uses to enter your living space.
We encourage you to pair DIY tests with good local information, including county data and media investigations. The Columbus Dispatch, for instance, tested 68 homes in our area and reported that a majority showed elevated readings, which underlines why periodic retesting makes sense even if your first DIY test looked fine.
Did You Know?
55% of Americans say they are not concerned about radon in their homes, communities, or schools, even though effective testing depends on taking the risk seriously enough to do it correctly.
7. Using DIY Results Incorrectly In Home Sales And Negotiations
DIY kits often show up during real estate transactions, when buyers or sellers want quick clarity. The problem comes when a single short‑term test is used to over‑promise a “radon‑free” home or to ignore local norms around mitigation.
In markets like Columbus, it is common to negotiate mitigation installation if a professional test shows levels at or above the 4.0 pCi/L action guideline. When buyers rely on a rushed, poorly placed DIY test, they may miss the opportunity to address radon while the transaction is open, which can be more expensive later.
On the other hand, a high DIY result should be confirmed with a properly documented test before you start adjusting prices or making demands. Professional tests come with calibration records and standardized reporting, which helps everyone involved make calm, informed decisions.

8. Assuming DIY Testing Means DIY Radon Mitigation Too
DIY radon testing is usually safe and straightforward when instructions are followed, but mitigation is a different level of complexity. We frequently see homeowners attempt partial fixes, such as sealing a few cracks, then re‑testing and assuming the problem is solved because the number changed slightly.
Modern mitigation systems, like active soil depressurization under slabs or in crawlspaces, rely on carefully calculated suction, pipe sizing, and fan performance. Typical systems in Columbus range from about $800 to $2,500 depending on foundation type, with crawlspace encapsulation packages running from about $1,800 to $3,200 when moisture and access issues are involved.
Improvised DIY systems can be noisy, ineffective, or even pull conditioned air out of the home unnecessarily. If you want to handle the initial testing yourself, that is reasonable, but we recommend bringing in certified specialists when results suggest that a mitigation system is appropriate.

9. Forgetting To Re‑Test After Home Changes Or Mitigation
Even careful DIY testers sometimes make a final mistake, which is never re‑testing after major home changes or after a mitigation system goes in. Basement finishing, sump pump installation, new HVAC equipment, or sealing and insulation projects can subtly change building pressures and radon entry patterns.
Professional mitigation companies always include post‑installation testing to verify that the system is doing its job. We also recommend retesting every few years and after any significant structural project, either with DIY kits or with a certified continuous monitor.
If a fan fails or a discharge pipe becomes blocked over time, indoor levels can rise again without any visible sign. A simple re‑test is an inexpensive way to confirm that your earlier investment in mitigation is still delivering the level of protection you intended for your family.


10. Not Using Available Professional And Community Support
The final DIY radon testing mistake is trying to figure everything out alone when there are reliable local resources available. In Central Ohio, that includes free monitor lending through library programs, certified testing services, and NRPP‑certified mitigation companies that can walk you through your options.
Continuous monitors borrowed from community programs are especially useful for seeing how your levels move over several days or weeks. Combine that with a professional test when results are elevated, and you get both the broad view and the precise documentation you need to plan next steps.
We encourage homeowners to think of DIY testing as part of a partnership, not a replacement for expert help. Our role is to interpret the numbers with you, explain what they mean for your particular foundation and location, and design systems that reliably keep levels down over the long term.


Conclusion
DIY radon testing is an excellent first step, but small mistakes can lead to results that do not reflect what your family actually breathes day after day. Choosing the right test, placing it correctly, following EPA closed‑house guidance, and understanding local risk all matter if you want your efforts to count.
When readings are elevated, when the numbers are confusing, or when a real estate transaction is on the line, professional testing and mitigation give you accurate data and long‑term reliability. Our team is here to answer questions, review your DIY results, and design systems that keep radon levels under control in Columbus and the surrounding communities.